You know how a dryer can look completely dead, then turn out to have a blocked vent, a dirty sensor, or one missed power check. That is why Comprehensive Lg Dryer Repair: Tips, Troubleshooting, and Professional Service Options should start with diagnosis, not guesswork.
As of April 2026, LG lists its laundry flat-rate repair starting at $369, parts and labor included. That makes it worth trying the safe fixes first, then moving quickly to professional repair when the signs point to a failed part or a safety issue.
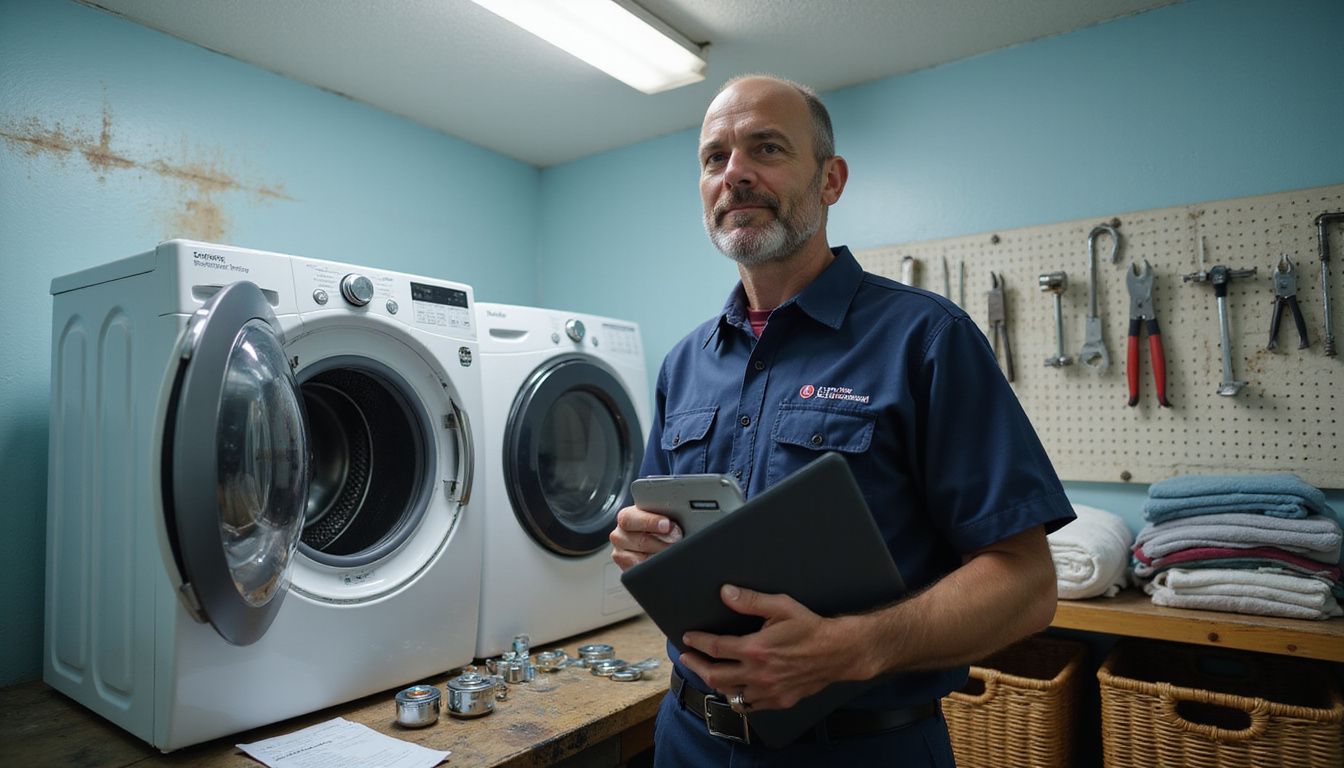
In my 25 years repairing appliances in Staten Island, I have found that airflow problems, mixed loads, and dirty moisture sensors cause far more dryer complaints than most homeowners expect.
So I am going to break down the common LG dryer issues, the fastest troubleshooting steps, the maintenance that prevents repeat failures, and the service options to use when DIY is no longer the smart move.
Key Takeaways
- LG’s flat-rate laundry repair currently starts at $369 before tax, includes parts and labor, and comes with a 90-day repair warranty for eligible dryers.
- Clean the lint filter after every load, inspect the vent path monthly, and schedule full vent cleaning about once a year, or sooner if drying times climb.
- Start troubleshooting with power, airflow, load size, and sensor cleaning before you assume the heating element or control board has failed.
- Call for professional repair if you smell burning after the break-in period, hear grinding or scraping, see repeated airflow codes, or the dryer still fails after basic checks.

Comprehensive Lg Dryer Repair: Tips, Troubleshooting, and Professional Service Options for Common LG Dryer Problems

Most homeowners land here for one of four reasons: no heat, slow drying, strange noise, or a dryer that will not start. This section helps you separate simple maintenance issues from faults that need professional appliance repair.
Watch a quick LG dryer troubleshooting walkthrough.
| Symptom | Most likely cause | Best next step |
|---|---|---|
| Runs, but no heat | Restricted airflow, failed heating part, or power issue | Clean the vent path first, then test heat-related parts |
| Takes too long to dry | Dirty venting, mixed fabrics, overloaded drum, or dirty sensor | Reduce load size, clean sensors, and check outside airflow |
| Makes loud noise | Worn rollers, belt, pulley, blower wheel, or a loose object | Stop using it if the sound is harsh or gets worse fast |
| Will not start | Breaker, outlet, cord, door switch, or control issue | Check power and reset the unit before opening the cabinet |
Why is my LG dryer not heating properly?
A clogged vent or dirty lint filter is still the first thing to check, and LG’s current help pages point to restricted airflow as the most common reason a dryer runs without drying well. On many models, poor airflow also keeps the heater from staying on for the full cycle.
Start with the easy wins: clean the lint screen, inspect the vent hose for crushing, and check the outside hood while the dryer is running. If your model supports an installation test or shows airflow warnings such as d80, d90, or d95, treat that as a venting problem first, not a parts-shopping problem.
- Clean the lint screen and trap housing.
- Inspect the full vent path, from the back of the dryer to the outside hood.
- For small or mixed loads, switch from Sensor Dry to a timed cycle if clothes keep coming out damp.
- If airflow is good and heat is still missing, test the heating element, thermostat, and thermal fuse with a multimeter.
If the dryer still has no heat after those checks, you are likely dealing with a failed heating element, thermal fuse, high-limit thermostat, or power supply problem. That is the point where a qualified repair technician saves you time and avoids unnecessary parts swaps.
What causes unusual noises during dryer operation?
Dryers should make a steady tumbling sound, not a grind, squeal, scrape, or sharp bang. In my experience, the usual culprits are worn drum rollers, an idler pulley, a loose blower wheel, or small objects like coins, bra wires, and zipper pulls bouncing inside the drum or blower housing.
- Squealing often points to rollers or the idler pulley.
- Rhythmic thumping can come from a roller flat spot or one bulky item wrapping and dropping.
- Sharp metal scraping can mean a glider, felt seal, or drum support issue.
- Loud rattling usually means something loose in a pocket or panel.
Start by checking pockets, the lint filter area, and any visible screws or panels. If the sound is getting louder, or you hear scraping metal, stop using the dryer and book professional repair before a simple wear part turns into drum or motor damage.
Why won’t my LG dryer start?
Check power first. LG’s no-power guidance says many start failures trace back to a tripped breaker, a bad outlet, or a loose power connection. On electric dryers, one breaker leg can trip while the control panel still lights up, so a dryer can look alive but still refuse to run or heat.
Open the door and check whether the drum light works. If it does not, inspect the outlet, cord, and breaker. LG also recommends a hard reset: unplug the dryer, hold the Power or Start button for 5 seconds, then hold Play or Pause for 5 seconds before plugging it back in.
- Reset both breakers on electric models.
- Make sure the door is fully latching.
- Check for a loose or scorched cord connection.
- If power is present but the dryer still will not run, suspect the door switch, belt switch, or control board.
If you find burned wiring, a melted terminal block, or repeat breaker trips, stop there and call a pro. That is an electrical repair, not a safe DIY job.
Why do clothes take too long to dry in my LG dryer?
Long dry times usually come down to airflow, load type, or sensor behavior. LG now advises drying similar fabrics together and keeping many loads about half full, because thin items can touch the moisture sensor first and end the cycle while thicker items are still damp.
That matters more than most homeowners think. If you mix towels with T-shirts, or dry just a few items on Sensor Dry, the machine may make the wrong call and stop early. LG also notes that very small loads often do better on Time Dry.
- Fill the drum about halfway for many sensor-dry loads.
- Separate thick fabrics from thin fabrics.
- Wipe the humidity sensor bars monthly to remove residue.
- Check outside airflow every time drying time suddenly increases.
If a normal load suddenly needs two or three cycles, inspect the vent path before replacing parts. Poor airflow raises energy use, strains the heater, and often causes the next repair bill.
Troubleshooting LG Dryer Issues
A good troubleshooting routine keeps you from replacing the wrong part. Start with power and airflow, then move to safety devices and heating components.
Watch a step-by-step LG dryer troubleshooting video.
- Confirm the dryer has the right power supply.
- Clean the lint filter, trap housing, and vent path.
- Run the dryer’s installation or airflow test if your model supports it.
- Test the thermal fuse, thermostat, and heating element only after airflow is confirmed.
How do I check the power supply for my LG dryer?
Turn off the dryer at the wall and breaker before touching any wiring. For most electric LG dryers, you want roughly 240 volts across the two hot terminals and about 120 volts from each hot leg to neutral. If one leg is missing, the drum may tumble or the panel may light, but heat will not work correctly.
LG’s support team also reminds homeowners that electric dryers usually use two breakers, not one. Reset both fully, not halfway, then retest the outlet. If the power cord or terminal block looks dark, loose, or scorched, stop and replace the damaged part before using the dryer again.
- Check the outlet with a multimeter.
- Inspect the plug and cord for heat damage.
- Tighten the terminal block only with power disconnected.
- Call an electrician if voltage stays low or the breaker trips again.
How can I inspect the lint filter and venting system?
Pull the lint screen out and clear it fully. Then vacuum the filter slot and the housing below it, because lint often packs below the screen where you cannot see it. After that, unplug the dryer and disconnect the vent to inspect the full duct run and outside hood.
The safety reason is real. USFA reports that failure to clean was the leading factor in 31% of home clothes-dryer fires in recent national fire data, and CPSC tells homeowners to clean the lint screen, dryer vent, and exhaust duct periodically.
Use this order every time you troubleshoot weak drying or overheating:
- Clean the lint screen and housing.
- Disconnect the vent and check for crushed or kinked sections.
- Use a brush or vacuum to clear the duct and outside hood.
- Run the dryer and confirm strong airflow outdoors.
If your dryer shows airflow warnings, or you need to inspect the venting and exhaust system more deeply, handle that before you order any heat-related parts. Airflow problems can mimic a bad element and can also blow the thermal fuse.
How do I examine the thermal fuse and thermostat?
Unplug the dryer and access the thermal fuse and thermostat through the rear or front service panel, depending on the model. The thermal fuse is a one-time safety device, so if it has no continuity, you replace it. You do not reset it.
The more important point is this: a blown thermal fuse is usually a symptom, not the root cause. Restricted airflow, a blocked vent, or a heater that ran too hot often caused it, so you need to fix the airflow issue or the new fuse may fail again.
- Label wires before disconnecting them.
- Test continuity with the dryer unplugged.
- Inspect nearby terminals for heat damage.
- Compare readings and part placement with your model’s service manual.
If the readings are unclear, or you are unsure whether you are testing the correct thermostat, call for repair. A wrong diagnosis here leads to repeat failures.
How do I test the heating element in my LG dryer?
Shut off power, remove the access panel, and visually inspect the heating element for a broken coil, burn marks, or contact against the housing. Then use a multimeter to test continuity across the element terminals. An open circuit usually means the element has failed.
LG’s installation-check guidance is useful here too. If the dryer shows a venting problem during the test, correct the airflow restriction before you install a new element. A restricted vent makes the heater cycle off for safety and can shorten the life of replacement parts.
- Check the element for visible coil damage.
- Test the thermal fuse and high-limit thermostat in the same session.
- Use genuine replacement parts whenever possible.
- Reassemble fully before running a heat test.
Essential LG Dryer Maintenance Tips
Good dryer maintenance is simple, but it has to be consistent. A clean airflow path improves drying speed, lowers energy use, and reduces the chance that a small problem turns into an emergency repair.
Watch a quick LG dryer maintenance video.
- Clean the lint filter after every load.
- Wipe the moisture sensor bars about once a month.
- Check the outside vent hood for strong airflow.
- Schedule full vent cleaning about once a year for most homes.
How often should I clean the lint filter?
Clean it after every load, every time. That is the fastest way to protect dryer performance and reduce fire risk.
If drying times are creeping up even though the screen looks clean, go one step further and vacuum the lint trap housing. Some LG owners also get app or panel reminders to rinse the filter with water periodically, which helps when fabric softener residue starts sealing the mesh.
LG also advises cleaning the humidity sensor regularly. A dirty sensor can misread the load and cause under-drying or over-drying, so monthly sensor cleaning is a smart habit if you use Sensor Dry often.
What is the proper way to install and clean dryer vents?
LG’s current venting guidance calls for 4-inch metal ducting and a short, straight run whenever possible. Flexible transition duct should stay limited, and on current LG guidance the total flexible metal length should not exceed 8 feet. Gas dryers must vent outdoors.
That detail matters because long, crushed, or overly bent vent runs hurt airflow before lint ever becomes the problem. LG also subtracts vent capacity for elbows, so a tidy installation is not cosmetic, it directly affects drying performance and repair risk.
- Use rigid or semi-rigid metal duct whenever you can.
- Keep the run as short and straight as possible.
- Secure joints correctly and avoid flimsy plastic or foil-style ducting.
- Schedule duct cleaning about every year, or sooner if clothes stay damp.
Finish with the outside exit point. Check the exhaust cap outside and clear lint, nests, or a stuck damper so moist air can leave the home quickly.
How can I avoid overloading my LG dryer?
Give the load room to tumble. LG’s recent drying guidance recommends many loads be kept around half full, or roughly 50 to 60% of maximum capacity, for better sensor accuracy and airflow.
That advice is especially important for bulky or mixed loads. Large towels, sheets, and hoodies dry at different speeds than lightweight shirts. If you pack them together, the sensor may read the dry items first and stop the cycle too soon.
- Dry thick fabrics together and light fabrics together.
- Run large items individually when possible.
- Use Time Dry for very small loads.
- Split a packed load before you blame the heater.
When to Call for Professional Repair Services
There is a point where more troubleshooting stops saving money. If the dryer still fails after the safe checks, or it shows signs of electrical or mechanical damage, professional repair is the better move.
Stop using the dryer right away if you smell persistent burning, see smoke, hear metal scraping, or find damaged wiring. Those are repair-now problems, not wait-and-see problems.
How do I know if an issue is beyond basic troubleshooting?
Basic troubleshooting covers power, breaker resets, lint cleaning, vent cleaning, load size, and moisture sensor cleaning. Once you move into live-voltage diagnosis, burner parts, internal wiring, or repeated component failures, you are past the DIY zone.
LG’s support articles are a good line in the sand here. If you have completed the airflow and power checks and the dryer still does not heat, still shuts off, or still will not start, service is usually required for a proper diagnosis.
- The breaker trips again after reset.
- The terminal block or wiring shows heat damage.
- The drum does not turn, or the motor hums without starting.
- The dryer still fails after vent cleaning and a hard reset.
What are the signs my LG dryer needs expert repair?
Persistent weak heat, repeated long dry times, loud grinding, scraping, or new burning smells are all solid reasons to book repair. On newer units, repeated airflow codes after the entire vent run has been cleaned also deserve an expert look because the issue may be inside the cabinet, blower housing, or sensor system.
Another clear sign is repeat part failure. If a thermal fuse blows again, or a dryer keeps overheating after you cleaned the vent, a technician needs to track the root cause instead of replacing the same safety part again.
| Warning sign | Why it matters | Best response |
|---|---|---|
| Burning smell that does not go away | Possible lint ignition, wiring damage, or overheating part | Stop use and schedule service |
| Loud scraping or grinding | Wear parts may be damaging the drum or motor | Stop use and inspect professionally |
| Repeated breaker trips | Electrical fault or wiring problem | Call an electrician or appliance technician |
| No heat after airflow checks | Likely failed element, fuse, thermostat, or power issue | Book professional repair |
Related: Maytag Dryer Repair Tips
The Maytag dryer repair tips guide is useful if you are comparing brand-specific symptoms or servicing more than one dryer in your home. It covers the same core ideas: airflow first, safe troubleshooting second, and professional repair once the fix moves beyond routine maintenance.
Use it as a side-by-side reference if you are deciding whether a noise, heat loss, or long dry time is model-specific or a more general dryer issue.
LG Flat-Rate Repair Program
LG flat-rate repair service is the clearest official option for out-of-warranty dryer repair if your unit qualifies. It is designed to simplify the decision for homeowners who want predictable pricing and factory-backed parts.
| Official program detail | What it means for you |
|---|---|
| Starting price for laundry: $369 | You get a predictable starting point for dryer, washer, and combo repairs |
| Parts and labor included | You do not get surprised by separate labor and parts charges inside the program |
| 90-day repair warranty | You get short-term protection if the same repair issue returns |
| Eligibility usually within 7 years, some models up to 10 | Older units may not qualify, so check before you rely on flat-rate pricing |
What is the LG flat-rate repair service?
LG currently lists laundry repairs at a starting price of $369 before tax. The program covers the reported malfunction, the labor, and the necessary LG parts for one eligible appliance, which makes it attractive when you suspect a heating element, motor, sensor system, or control issue that needs a certified diagnosis.
The official FAQ also adds two practical details most general repair articles miss. If you cancel before technician dispatch, you get a full refund. If you cancel after dispatch, LG says the refund is reduced by a $125 dispatch fee.
This program is usually available for appliances manufactured within the last 7 years, with some dryers eligible up to 10 years. That age check is worth doing before you assume the flat-rate option will apply to your machine.
What are the benefits of using LG-certified technicians?
The biggest benefit is parts accuracy. LG-certified technicians work with genuine LG parts and model-specific service information, which cuts down on the guesswork that can happen when a dryer problem involves sensors, boards, or model-specific error behavior.
- Factory-trained diagnosis for LG-specific faults
- Genuine LG replacement parts
- Clearer warranty handling for eligible products
- A 90-day warranty on the completed repair
If your dryer is newer, under coverage, or tied to a smart feature set, certified service is usually the safer path. It protects you from using the wrong replacement part and from losing time on repeat visits.
Locating LG Authorized Service Centers
Finding the right service center matters almost as much as diagnosing the fault. You want a technician who can confirm the model, source the correct part, and tell you early whether the dryer is worth repairing.
How can I find a nearby LG service center?
Start with LG support and the official repair-request tools. LG’s support pages currently list online repair requests and chat support as available 24 hours a day, while the main customer service line is listed at 1-800-243-0000 daily from 8:00 a.m. to 9:00 p.m. Eastern.
Have your model number, serial number, and a clear symptom ready before you search. That speeds up scheduling and helps you avoid a vague ticket that leads to a delayed parts order.
If you are in Staten Island and want local help, our team at Appliance Repair Staten Island Inc has served local homes since 1995. You can also contact our certified team for local repair help if you want a nearby technician to inspect the unit quickly.
How do I schedule a repair appointment?
Use LG’s online repair request if you want the fastest paper trail. Premium Care customers can also call 1-855-549-0540 for dedicated help, and LG lists 1-888-376-6825 for rescheduling flat-rate appointments.
- Write down the full model and serial number.
- Note any error codes, smells, noises, and whether the drum heats or turns.
- Take one photo of the rating tag and one of the vent setup behind the dryer.
- Clear a path to the appliance before the technician arrives.
That last step saves time. If the technician can access the rear panel and vent connection right away, your visit moves faster and the diagnosis is usually more accurate.
Cost of LG Dryer Repairs
Repair costs depend on the fault, the age of the dryer, and whether you use LG’s flat-rate program or a local service call. The real value is not just the price of the part, it is whether the repair solves the problem on the first visit.
| Issue | Typical repair path | What most affects cost |
|---|---|---|
| No heat | Element, fuse, thermostat, or power diagnosis | Part failure versus airflow-related damage |
| Long dry time | Vent cleaning, sensor cleaning, or airflow correction | Whether the problem is inside the dryer or in the house duct |
| Will not start | Power, door switch, wiring, or control board diagnosis | Electrical labor and board availability |
| Loud noise | Rollers, pulley, belt, blower wheel, or motor work | How many wear parts are replaced together |
What are typical repair costs for common LG dryer issues?
If your dryer qualifies, LG’s current flat-rate program gives you the cleanest number to work from: laundry repairs start at $369 before tax, with parts and labor included. For homeowners who want predictable costs, that can be easier to budget than a variable diagnostic and part-by-part repair bill.
Local repair pricing outside that program varies by part, labor, and travel, so the smartest money move is still solid troubleshooting. If the fix is a blocked vent, a dirty sensor, or a bad power connection, you do not want to pay for a heating element that was never the problem.
One more practical note: if you book flat-rate repair and cancel after the technician has been dispatched, LG says the refund is reduced by a $125 dispatch fee. That makes it worth confirming basic airflow and power checks before you schedule.
Does warranty cover LG dryer repairs or offer discounts?
The answer depends on the product’s age, purchase date, and model-specific warranty terms. The safest move is to check warranty status before you approve any out-of-pocket repair, especially on a newer dryer with electronic or motor issues.
Even if the original product warranty has expired, LG’s flat-rate repair program currently includes a 90-day warranty on the completed repair. Promotions change over time, so if you are hoping for a special offer, ask customer support at the time you book instead of relying on older coupons or outdated service articles.
Let’s Conclude: Comprehensive Lg Dryer Repair: Tips, Troubleshooting, and Professional Service Options
Use this guide for Comprehensive Lg Dryer Repair: Tips, Troubleshooting, and Professional Service Options whenever your dryer stops heating, starts running loud, or suddenly takes too long to finish a load.
Start with power, airflow, load size, and sensor cleaning. Those steps solve more LG dryer issues than most homeowners expect.
If the problem points to internal parts, electrical damage, or repeat failure, call a certified technician for professional repair and warranty assistance. If you need local service in Staten Island, Appliance Repair Staten Island Inc can help with fast scheduling, clear pricing, and experienced dryer diagnosis.
FAQs
1. What quick troubleshooting steps can fix an LG dryer?
Check power and the circuit. Clean the lint trap and the vent. Remove heavy loads and level the machine, then run a short cycle to test.
2. Can I do LG dryer repair myself?
Use simple tips like cleaning vents and checking the plug. Do not open electrical parts or replace major parts if you lack tools or skill. Call certified technicians to avoid safety risk and voiding any warranty.
3. When should I choose professional service options?
Choose a pro if the dryer still fails after basic troubleshooting, if you smell burning, or if the unit is under warranty. Schedule service with a certified technician for fast diagnosis.
4. What should I expect from a repair visit?
A technician will diagnose the problem, give an upfront price, and use genuine parts when needed. You will get a clear repair plan, warranty on work, and options to repair or replace. Call, use live chat, or email to book service and get hours and contact details.