You know how a dryer can seem like it is slowly getting worse, one extra cycle here, hotter cabinet there, a little more lint on the floor each week? In my experience, that pattern usually points to a dryer duct repair issue before it points to a bad dryer.
In more than 25 years of appliance repair, I have seen homeowners replace thermostats, heating elements, and even entire dryers when the real problem was crushed, leaking, or clogged ductwork. The key difference is this: a weak duct does not just waste time, it also raises fire risk and can create a carbon monoxide concern on gas models.
USFA reports that failure to clean caused 31% of home clothes dryer fires from 2018 through 2020.
So this guide breaks down the warning signs, the real causes, the safety risks, the repair process, and the smartest way to decide between DIY work and professional help. If you want better airflow, lower energy waste, and a safer laundry room, start here.
Key Takeaways
- Slow drying is a real warning sign. If a normal load suddenly needs two cycles, the problem is often restricted airflow, not weak heat.
- Current code-based best practice is specific. Smooth metal duct, 4-inch diameter, listed transition duct, and no screen at the exterior hood give you safer airflow and easier cleaning.
- Lint is still the main preventable fire issue. NFPA research found failure to clean contributed to about 4,470 home dryer fires per year in its latest widely used dryer-fire study.
- Repair costs depend on access and layout. Angi’s 2026 cost data puts basic cleaning at about $75 to $335, standard vent replacement at about $100 to $300, and rerouting at roughly $200 to $500 for many homes.
A good dryer duct repair improves three things at once: safety, drying time, and appliance life. That is why it usually pays for itself faster than homeowners expect.

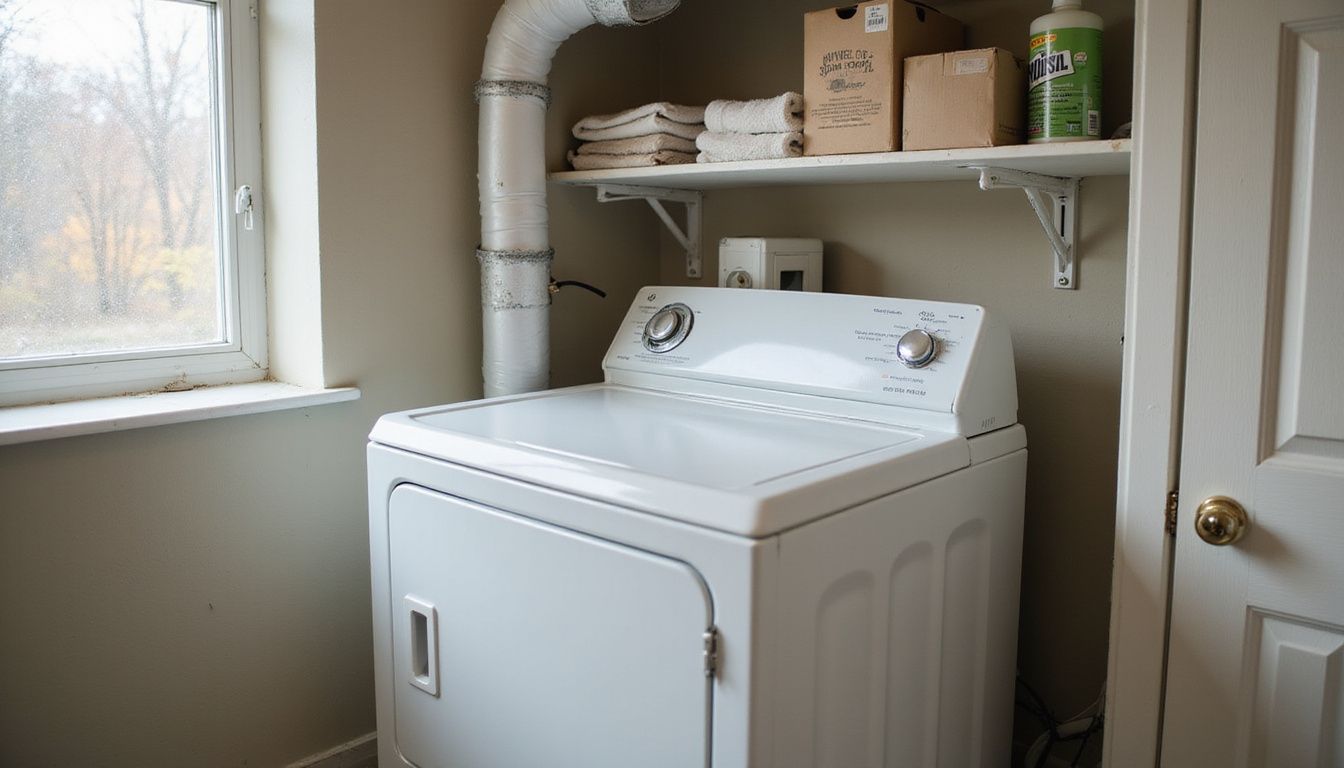
What Are Common Signs Your Dryer Duct Needs Repair?

Dryer ducts usually give you warning before they fail outright. The trick is knowing which symptoms point to a cleaning issue and which ones point to damaged ductwork that needs repair or replacement.
The official USFA dryer safety flyer tells homeowners to watch the vent behind the dryer and make sure the outdoor hood opens during operation. If that flap stays shut, airflow is already in trouble.
- Longer drying times: A load that used to dry in one cycle now needs two, especially towels or jeans. That usually means heat and moisture are getting trapped in the duct instead of leaving the house.
- Higher utility use: When airflow drops, the dryer runs longer. Whirlpool’s current installation guidance warns that long or restricted vent runs reduce performance and increase energy use.
- Excessive cabinet heat: If the top or sides of the dryer feel unusually hot, stop guessing and inspect the vent path. Heat buildup is one of the clearest signs of a clog, a crushed transition hose, or too many tight turns.
- Lint where it should not be: Lint on the floor, around the wall connection, or outside near the vent hood often means a loose joint, a split duct, or a blockage forcing lint out through gaps.
- Rattling, whistling, or thumping: These noises often come from loose metal joints, a disconnected section behind the dryer, or a bird nest or lint plug near the exterior hood.
- Moisture and musty odors: Damp walls, condensation, or a stale smell in the laundry room mean moist exhaust air is leaking indoors instead of venting outside.
- Repeated overheating shutoffs: Many dryers protect themselves by stopping mid-cycle. Treat that as a warning, not a glitch.
- A vent flap that barely moves: Weak airflow at the outside termination almost always means the system needs cleaning, repair, or a shorter route.
If you notice a burning smell, stop using the dryer until the duct is inspected. That is one sign you do not want to test twice.
Watch a clogged vent inspection example
What Causes Dryer Duct Damage?
Most dryer duct failures come from four things: bad installation, lint buildup, age, and pests. A lot of top-ranking articles stop at “clean the lint,” but layout and materials matter just as much.
That matters because a duct can look acceptable from behind the dryer and still fail inside a wall, attic, crawl space, or long horizontal run.
Watch a dryer vent repair overview
How Does Poor Installation Affect Dryer Ducts?
Poor installation creates problems from day one. The 2024 Mechanical Code of New York State, which reflects the kind of requirements many U.S. jurisdictions use, calls for smooth metal duct, 4-inch diameter, support every 4 feet, and a listed transition duct no longer than 8 feet.
When installers use foil accordion hose, leave long unsupported sags, or drive screws into the duct path, lint catches faster and airflow drops sooner. What looks like a cheap shortcut usually becomes a service call.
- Wrong material: Plastic and thin foil hoses kink easily, tear easily, and trap lint in the ridges.
- Too many sharp turns: Base code commonly starts with a 35-foot maximum run, then reduces allowable length for elbows. A single tight 90-degree turn can cost you the equivalent of about 5 feet.
- Poor support: Unsupported ductwork sags, fills with lint, and holds moisture.
- Bad fastening: Protruding fasteners catch lint and start mini choke points inside the pipe.
Install rigid metal ducts where possible. They stay round, clean out better, and give you the most predictable airflow.
Why Does Lint and Debris Accumulate in Dryer Ducts?
Lint does not stop at the lint screen. Fine fibers pass the filter, collect in the blower housing, catch on seams and bends, and build up at the exterior termination where moist air meets cooler outdoor air.
NFPA’s latest dryer-fire research found failure to clean contributed to about 4,470 home dryer fires a year, and dust, fiber, and lint were the item first ignited in about 3,680 of those fires. That is why a clean screen alone does not mean the system is safe.
If your dryer is running longer and the lint screen still looks normal, do not assume the vent is clear. Hidden lint in the duct is exactly what makes these problems so easy to miss.
The most overlooked spot, in my experience, is the area just past the lint filter and blower outlet. USFA also tells homeowners to clean behind the dryer, because that is where escaping lint often reveals a deeper blockage.
How Does Wear and Tear Impact Dryer Ducts Over Time?
Heat cycles slowly loosen joints and clamps. Every time the dryer heats up and cools down, the duct expands and contracts a little. Over years, that movement can separate fittings, flatten flexible sections, and create leaks you never see from the front of the appliance.
Current Whirlpool guidance is blunt on this point: vent systems longer than the recommended chart reduce performance, increase energy use, and shorten dryer life. So when an older system starts sagging or leaking, repair is not just about code, it is about protecting the appliance itself.
- Check behind the dryer for crushed or flattened sections.
- Inspect attic and crawl-space runs for disconnected joints.
- Look for rust, pinholes, or tape that has dried out and lifted.
- Replace any section that stays misshapen after you disconnect it.
Schedule routine inspection before a small leak turns into moisture damage inside the wall or lint spread around the laundry room.
Can Pests or Birds Damage Dryer Ducts?
Yes, and the damage is more common than homeowners think. Birds, mice, and squirrels look for warm, protected openings, especially during cooler months.
Current code language requires a backdraft damper and specifically says screens should not be installed at the termination. That is important because ordinary mesh seems helpful but often catches lint, which then becomes both a clog and a nesting base.
- Nests block airflow: Drying times climb fast, and overheating follows.
- Chewed or lifted flaps let weather in: That adds moisture and can rust nearby metal.
- The right fix is a dryer-safe guard: Products such as the Nixalite Defender are made to keep animals out without using lint-catching screen mesh.
Do a quick exterior check every month. If the flap is stuck open, packed with nesting material, or missing entirely, repair it before you run another load.
What Are the Safety Risks of a Damaged Dryer Duct?
A damaged dryer duct raises two serious risks: fire from overheating and lint ignition, and combustion gas spillage on gas dryers. Neither problem gives you much room for trial and error.
The safest rule is simple: if airflow is weak, the dryer stays off until you know why.
Watch a dryer vent fire safety video
How Does Lint Buildup Cause Fire Hazards?
Lint is light, dry, and highly combustible. Once a vent clogs, hot air cannot escape at the rate the dryer was designed for, so temperatures rise inside the cabinet, duct, and surrounding laundry area.
NFPA estimates that U.S. fire departments responded to about 13,820 home dryer fires per year in its most recent major study, causing 344 injuries and $233 million in direct property damage. Electric dryers accounted for 78% of those fires, which makes routine cleaning and duct inspection worth treating like any other home safety task.
Fire risk does not start when flames appear. It starts when lint, restricted airflow, and high heat begin working together inside a hidden duct.
Visible lint near the dryer, a hot cabinet, a burning smell, or repeated thermal shutoffs all mean the system needs immediate attention. Add smoke detection near the laundry area, but do not treat alarms as a substitute for proper repair.
What Are the Risks of Carbon Monoxide Leaks in Gas Dryers?
Gas dryers burn fuel, which means the vent system has to move both moisture and combustion byproducts outside. If the duct is cracked, blocked, or disconnected, those gases can spill back into the house.
Mayo Clinic and the CDC both list early carbon monoxide symptoms such as headache, dizziness, weakness, nausea, and confusion. If anyone feels ill when the gas dryer is running, shut it down, leave the area, and get the vent inspected right away.
- Never vent a gas dryer indoors. The exhaust has to terminate outside.
- Use a CO alarm wisely. EPA says if you have only one alarm, put it near sleeping areas so it can wake you. If your laundry area is isolated, add another alarm nearby and follow the manufacturer’s placement instructions.
- Do not ignore moisture clues. Musty smells and long cycles often show up before a dangerous backdraft becomes obvious.
Professional service matters most on gas models because safe venting, burner performance, and exhaust routing all have to work together. Repairs cut the risk of carbon monoxide exposure while restoring normal drying performance.
Key Steps in Professional Dryer Duct Repair
A pro inspects the full dryer duct system, not just the section you can see behind the machine. Good repair work fixes the airflow problem, confirms the route is safe, and replaces weak materials with code-compliant parts.
Inspecting the Entire Dryer Duct System
A proper inspection starts by unplugging the dryer, shutting off gas if needed, and disconnecting the transition duct so both ends of the system are visible. Then the tech checks the wall connection, hidden route, and exterior hood as one continuous path.
InterNACHI’s inspection materials also reinforce a basic rule homeowners miss all the time: a clothes dryer must vent directly outdoors unless it is a listed ventless condensing model.
- Inspect the transition duct for kinks, crushing, and foil tears.
- Open and test the exterior vent damper so it swings freely.
- Check attics, crawl spaces, and wall cavities where accessible.
- Measure the route if the run looks long or elbow-heavy.
- Verify all clamps and foil-tape seals are tight after reassembly.
That full-path approach is what separates a real repair from a quick lint removal.
Identifying Clogs, Leaks, and Structural Damage
Different symptoms point to different repairs. A good technician does not treat every problem like “just cleaning.”
| What you notice | What it often means | Best next step |
|---|---|---|
| Two-cycle drying, weak outside airflow | Lint clog in the run or hood | Full cleaning and airflow check |
| Lint around the dryer or wall | Loose joint, split duct, or disconnected section | Reseal or replace damaged ductwork |
| Hot cabinet or thermal shutoff | Crushed transition hose or severe restriction | Stop use and inspect immediately |
| Musty smell or damp laundry room | Moist exhaust leaking indoors | Repair leaks and verify exterior termination |
| Bird activity or debris at vent hood | Nesting or damaged exterior cap | Remove blockage and install proper guard or damper |
This is also where professionals catch hidden code issues, such as venting into an attic, using the wrong material, or exceeding practical duct length for the dryer model.
Using Proper Tools and Materials for Repairs
The right tools make a big difference. A pro usually uses a rotary brush system, high-suction vacuum, inspection camera, clamps, and heat-rated foil tape, then replaces bad sections with smoother metal ducting.
The official code language is precise here for a reason: transition ducts should be a single listed length, no longer than 8 feet, and should not be concealed inside construction. That one detail alone prevents a lot of hidden failures behind finished walls.
- Rigid metal duct: Best choice for long-term airflow and low lint retention.
- Semi-rigid transition duct: Useful behind the dryer where some movement is needed.
- Foil tape and clamps: Better than ordinary duct tape, which dries out and fails under heat.
- No interior fastener points: Anything that snags lint shortens the time before the next clog.
Choose code-compliant materials once, and you usually avoid paying twice for the same repair.
What Should You Know About Dryer Exhaust Repair?
Dryer exhaust repair focuses on the route that carries heat, moisture, lint, and, on gas dryers, combustion byproducts to the outside. Cleaning removes buildup. Exhaust repair fixes the path itself.
That difference matters because a clean but damaged vent can still leak moist air into the wall, dump lint in the laundry room, or backdraft a gas dryer. If the run is crushed, disconnected, routed to the attic, or built from the wrong material, cleaning alone will not solve the problem.
- Repair is enough when the route is sound but has a loose joint, bad damper, short damaged section, or isolated blockage.
- Replacement makes more sense when the duct is foil or plastic, badly crushed, rusted through, or repeatedly clogging because the route is too long or poorly designed.
- Rerouting becomes the smart move when the dryer exhausts through a long interior path, the roof, or multiple tight elbows that keep causing callbacks.
Professional exhaust repair boosts airflow, lowers drying time, and reduces the chance of moisture damage and fire hazards. Appliance Repair Staten Island Inc has been serving local homeowners since 1995, and that kind of appliance-repair background matters because vent problems often overlap with thermostat, blower, or heating complaints.
The best repair plans are clear and specific. You should know whether the job calls for cleaning, sealing, replacement, rerouting, or a full appliance inspection before the work starts.
DIY vs. Professional Dryer Duct Repair: Which Is Best?
Minor dryer duct fixes can save money, especially on a short, straight run you can reach from both ends. Still, a lot of homeowners underestimate how fast a simple cleaning job turns into a routing, material, or safety problem.
What Tools Are Needed for Basic DIY Dryer Duct Repairs?
You can handle some maintenance yourself if the vent is short, accessible, and made from material that will not shred under a brush. The goal is to clean safely and avoid damaging the duct while you work.
- Dryer vent cleaning kit: Many homeowner kits cost about $20 to $40 and include flexible rods and a brush head for basic lint removal.
- Shop vacuum: Helpful for pulling loose lint from the dryer outlet, the transition duct, and the exterior hood area.
- Vent brush: Best for short runs and stubborn lint at bends and terminations.
- Foil tape and clamps: Use these to reseal joints after inspection or minor disassembly.
- Basic hand tools: Screwdriver, pliers, utility knife, flashlight, and work gloves cover most simple jobs.
- Safety gear: Eye protection and a dust mask help when lint comes out in heavy amounts.
A pro-tip I always share: if the duct is thin foil, badly crushed, or hidden in a wall, do not force a rotating brush through it. You can tear the duct, spread lint into the cavity, and turn a cleaning job into a repair job.
When Should You Hire a Professional for Dryer Duct Repair?
Hire a professional when the issue goes beyond basic surface lint. Angi’s 2026 guidance is useful here, because the cost gap between DIY supplies and a proper service visit is often smaller than the cost of a bad mistake.
Professional dryer vent cleaning often runs about $75 to $335, while a standard vent replacement commonly lands around $100 to $300. That makes expert help a reasonable decision once damage, height, gas service, or hidden ductwork enters the picture.
- Visible damage, disconnected sections, or crushed ductwork
- Roof, second-floor, or long hidden vent runs
- Gas dryers, especially with any sign of backdraft or odor
- Recurring clogs after you already cleaned the accessible parts
- Burning smells, overheating shutoffs, or lint escaping indoors
- Bird nests, damaged exterior hoods, or moisture inside the laundry room
For most homes, yearly inspection and cleaning is a solid baseline. Move that to every 6 to 9 months if you have pets, a large family, a long vent route, or repeated airflow problems.
How Does Regular Dryer Duct Maintenance Improve Efficiency?
Regular dryer duct maintenance keeps air moving the way the machine was designed to move it. That means shorter cycles, less heat stress, lower energy waste, and fewer surprise breakdowns.
How Can Maintenance Improve Drying Times and Save Energy?
Dryers need fast, steady exhaust to pull moisture out of clothes. When the vent slows down, the drum stays humid longer, so the machine runs longer to chase the same result.
Whirlpool’s current owner guidance says long or restricted vent systems reduce performance and increase energy usage. That is the practical reason maintenance matters, it gives the dryer an easier job every time you run it.
- Clean the lint screen before every load.
- Inspect the outdoor flap every month.
- Check behind the dryer every few months for crushing or loose joints.
- Schedule a full vent cleaning at least once a year, more often for high-use homes.
If your laundry volume is heavy or your route is long, twice-yearly service often makes more sense than waiting for symptoms.
How Does Maintenance Reduce Wear on Your Dryer?
Shorter cycles mean less strain on the motor, heater, thermostat, rollers, belt, and control system. That wear reduction is not theoretical, it shows up in fewer overheated parts and fewer “no heat” or “stops mid-cycle” complaints.
Good maintenance also protects fabrics. Clothes spend less time tumbling in high heat, which can reduce overdrying, shrinkage, and that baked-in feel towels get when the vent is restricted.
- Less heat stress: Lower chance of thermal fuse trips and heater overload.
- Less mechanical strain: The motor and blower do not fight a blocked exhaust path.
- Fewer emergency repairs: Small duct issues get fixed before they turn into appliance failures.
That is why dryer maintenance belongs in the same routine as changing HVAC filters and testing smoke alarms. It is simple prevention with a clear payoff.
How Much Does Dryer Duct Repair Cost?
Dryer duct repair cost depends on how much work the system actually needs. As of 2026, homeowner pricing data shows that access, vent length, damage severity, and whether the route needs rerouting are the biggest cost drivers.
| Item | What Affects Price | What Homeowners Should Know |
|---|---|---|
| Basic Cleaning | Location of the vent, height, and total run length | Typical cleaning runs about $75 to $335. First-floor vents usually cost less than roof or second-floor routes. |
| Inspection | Whether the company uses cameras, airflow checks, or a full appliance evaluation | Expect roughly $30 to $60 for a stand-alone inspection in many markets. Ask if that fee is credited to repair work. |
| Standard Vent Replacement | Length of duct, wall sleeve, transition duct, clamps, and labor | A standard replacement often lands around $100 to $300. This is common for damaged short runs behind the dryer. |
| New Installation or Rerouting | New wall or roof termination, drywall work, longer duct run, and layout complexity | Many reroutes fall in the $200 to $500 range, though more complex jobs can run much higher. |
| Pest or Nest Removal | Type of infestation and whether pest control is also needed | Removing nests and debris often adds about $120 to $250. |
| Long Vent Runs | Every added foot of material and labor, plus elbow penalties | Longer routes cost more to repair and more to keep clean. If your run is overly long, rerouting can save money over time. |
| Accessibility | Attic, crawl space, laundry closet, or stacked appliance setup | Hard-to-reach vents raise labor time fast. Ask for an itemized quote before work begins. |
| Repair vs. Replacement | Material condition and code compliance | If you still have foil or plastic ducting, replacement is often the smarter spend because it fixes both safety and performance at once. |
The smartest way to control cost is to catch the problem early. Cleaning and a short replacement are much cheaper than moisture damage, repeated service calls, or replacing a dryer that was never the real problem.
How Do You Find Reliable Dryer Duct Repair Services Near You?
Find a repair team that treats the duct as a safety system, not just a cleaning add-on. Clear criteria make it much easier to compare local providers, national brands, and appliance specialists.
- Ask what they inspect. A good company checks the dryer connection, hidden route, and exterior termination, not just the lint trap and one visible hose.
- Ask what material they install. You want rigid metal or a listed transition duct where appropriate, not a flimsy foil shortcut.
- Ask how they verify airflow. The best teams do more than “pull out lint.” They confirm the flap opens, the path is clear, and the system is reassembled correctly.
- Ask about gas dryer experience. Gas models raise the stakes because poor venting can create a combustion safety issue, not just slow drying.
- Request an itemized estimate. The quote should separate cleaning, repair, replacement parts, rerouting, exterior hood work, and any pest removal.
- Check reviews for specifics. Look for comments about punctuality, cleanup, communication, and whether the repair actually solved long drying times.
- Use recognized service names as a starting point. National operators such as Dryer Vent Wizard and Mr. Handyman can be useful for comparison, especially if you want multiple estimates.
- Prefer appliance-savvy technicians for mixed problems. If the issue could involve both airflow and the dryer itself, an appliance repair team can diagnose both sides of the problem in one visit.
- Ask about warranties and photos. Before-and-after pictures and written recommendations protect you from vague “all good now” service.
- If you are in Staten Island, work with a team that knows local homes. Eugene’s crew at Appliance Repair Staten Island Inc handles dryer airflow complaints, vent-related issues, and full appliance diagnostics, which is especially useful when the symptom could point to either the dryer or the duct.
Reliable service is usually easy to spot. The company explains the problem clearly, gives you a repair plan in plain English, and does not rush past code, safety, or airflow questions.
Conclusion
Dryer duct repair is one of the most practical safety upgrades you can make in a laundry room. It cuts drying time, improves efficiency, and lowers the risk of fire and venting problems.
If your dryer is hot, slow, noisy, or leaving lint and moisture behind, do not wait for a bigger failure. Schedule an inspection, fix the ductwork properly, and give the appliance the airflow it needs to run safely.
FAQs
1. What signs mean I need dryer duct repair?
Look for long dry times, excess lint near the exhaust, or the dryer feeling very hot, which signal safety risk and lower efficiency. Call for an inspection if you see these signs.
2. How does dryer duct repair boost safety and efficiency?
Repair and cleaning cut fire risk from lint buildup and improve airflow for faster drying. Code compliant work by licensed technicians also saves energy and money over time, Schedule Now to avoid danger.
3. What does a professional inspection and repair include?
A tech inspects the duct, filter area, and exhaust outlet for blockages and damage. They clean lint, fix duct parts, and test airflow to meet code compliance and efficiency targets. We back work with a warranty and customer ratings you can check, Learn More.
4. How much will dryer duct repair cost and how fast can I book?
Costs vary by damage and duct length, with small repairs starting low and full replacements costing more; many teams offer next day or same day service, Schedule Now.
References
- https://www.superiorvents.com/blog/common-signs-you-need-dryer-vent-repair
- https://www.providencejournal.com/press-release/story/46190/usfa-data-show-failure-to-clean-dryer-exhaust-ducts-remains-a-leading-cause-of-residential-dryer-fires/ (2026-03-20)
- https://natesdryerventcleaning.com/poor-dryer-installation-practices-causes-hazards/ (2023-10-26)
- https://www.metrowestdailynews.com/press-release/story/489125/usfa-data-show-failure-to-clean-dryer-exhaust-ducts-remains-a-leading-cause-of-residential-dryer-fires/ (2026-03-20)
- http://ductsalldone.com/our-blogs/how-lint-accumulation-affects-dryer-performance/ (2026-03-18)
- https://www.appliancepartspros.com/b/are-gas-dryers-a-carbon-monoxide-risk-what-you-should-know/?srsltid=AfmBOorGz-q41C8bC_VvFbc2jWFHsIAk0tGVS9kg-cJ_nnMl4hbGjd70 (2025-07-14)
- https://newconstructionsolutions.com/blog/ultimate-guide-to-repair-dryer-vent-ducts/
- https://www.dryerductco.com/how-to-avoid-dryer-vent-clogs-and-keep-your-dryer-running-smoothly/
- https://www.armadillo.one/resources/comprehensive-dryer-duct-cleaning-safety-efficiency-guide/ (2026-03-26)
- https://www.searsclean.com/blog/dryer-vent-diy-vs-professional (2025-01-29)
- https://www.coolbreezelv.com/post/dryer-vent-cleaning-tools-the-basics (2025-03-24)
- https://www.acdirect.com/blog/importance-of-regular-dryer-vent-cleaning (2024-11-10)
- https://www.dryerventwizard.com/locations/detroit/dryer-vent-installation/vent-installation
- https://safetyking.com/